

Today’s tutorial features the absolutely stunning Winter’s Grandeur panel from Robert Kaufman Fabrics. The design is inspired by the “All That Glitters” pattern by Christine Baker and Nellie Holmes, which used a different Christmas panel and measurements would not have worked with the Winter’s Grandeur panel.

The Winter’s Grandeur Quilt finishes at 45″ x 63″.
All seams should be stitched at 1/4″, unless stated otherwise.
To make the Winter’s Grandeur Quilt, you need*:
- Winter’s Grandeur panel
- 1/3 yard red (Fusions in Ruby) for inner borders and star centers
- 7/8 yard background fabric (Gold Snowflakes)
- 1/4 yard light green (Leaves in Leaf Green) for star points
- 1/4 yard dark green (Leaves in Hunter Green) for star points
- 7/8 yard Holiday Chevron for border blocks
- 1/2 yard binding (Fusions in Ruby)
- 2 1/2 yards backing
- 50″ x 70″ piece of batting
*Kits that include everything but batting backing are available in the shop.
Cutting Instructions:
- Panel: Trim selvages for a 24″ x 43″ piece
- 1/3 yard red:
- Cut two 2 1/4″ x width-of-fabric (WOF) strips; trim WOF to 43″
- Cut one 3″ WOF strip; trim WOF to 27.5″
- Cut one 3 1/2″ WOF strip; sub-cut into ten (10) 3 1/2″ squares
- 1/4 yard light green
- Cut two 3 1/2″ WOF strips; sub-cut into twenty (20) 3 1/2″ squares
- 1/4 yard dark green
- Cut two 3 1/2″ WOF strips; sub-cut into twenty (20) 3 1/2″ squares
- 7/8 yard background fabric
- Cut eight 3 1/2″ WOF strips; sub-cut into eighty (80) 3 1/2″ squares
- 7/8 yard Holiday Chevron fabric
- Cut three 9 1/2″ WOF strips; sub-cut into ten (10) 9 1/2″ squares
- 1/2 yard red for binding
- Cut into 2 1/2 WOF strips for binding

Begin by making the 10 wonky star blocks for the outer border. I will walk you through the basics of making a wonky star block. For a more detailed tutorial on wonky star blocks, see Fiber of All Sorts tutorial. We chose the wonky star block because it is easy for beginners, because it doesn’t require that you match points. Don’t you love this block already?
For each wonky star block, you’ll need one center square (shown in red), eight background squares (shown in cream snowflakes), and four star points squares (shown in light green). Each square should measure 3 1/2″. I recommend that you make one complete star block to make sure you have the technique mastered. Then you should be set to quicken the process with chain piecing.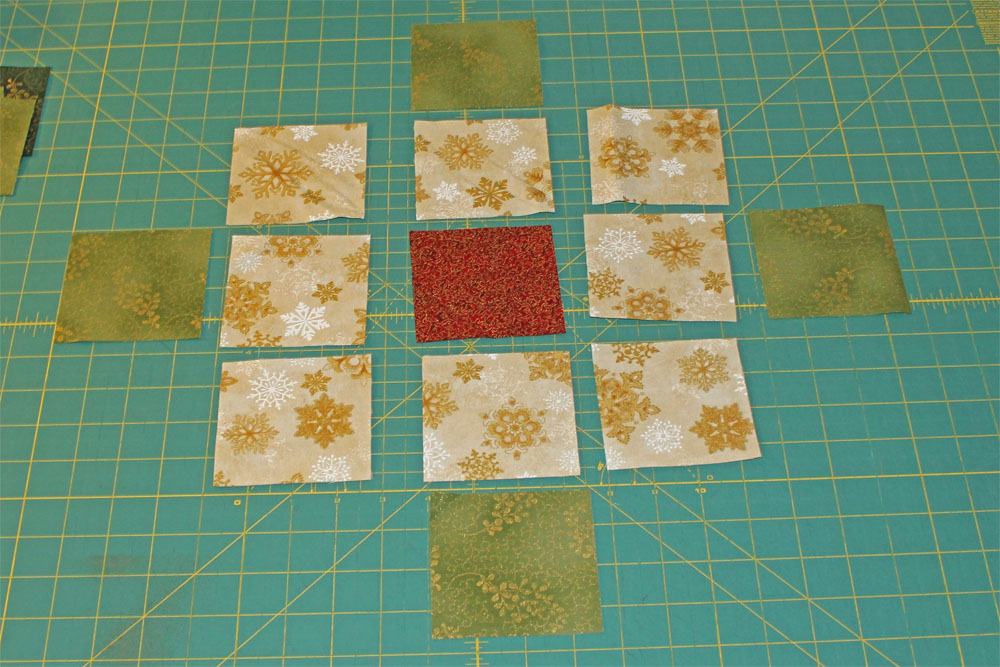 Cut each green square in half diagonally, as shown below.
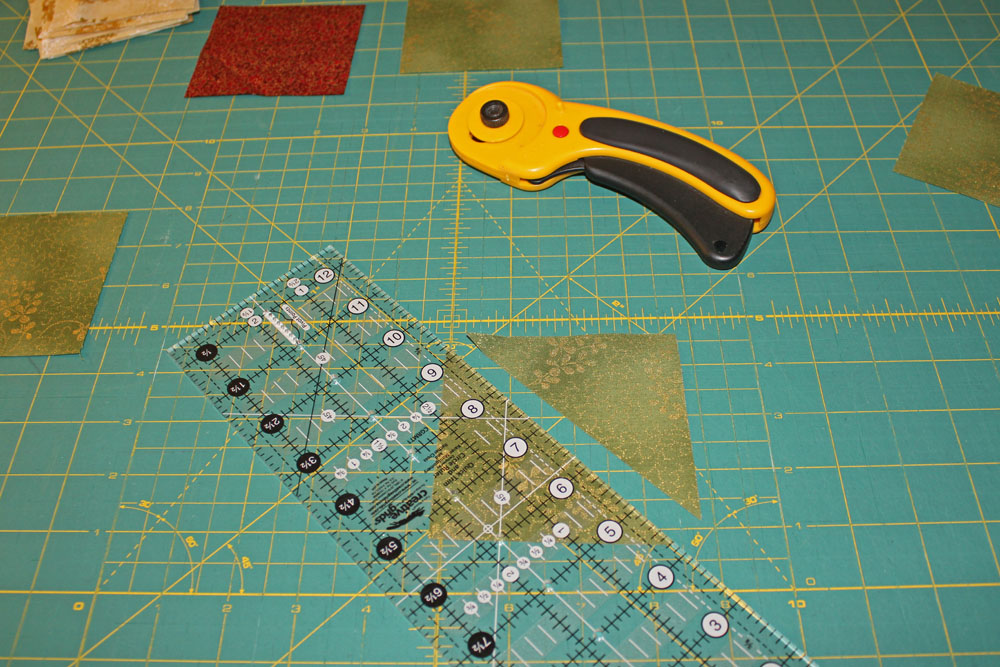
 Take one background square and one star point triangle. Play with how you’d like to place your triangle. Be sure that once you’ve stitched your seam that the triangle will open to cover to the corner of the background fabric. To test this, I finger pressed a 1/4″ seam on the triangle and place it, then turned it to right sides together and pin. For images of what NOT to do, see the Fiber of All Sorts tutorial.

Stitch a seam 1/4″ from the diagonally cut edge of the star point fabric. Trim background fabric and press open. Place the second star point triangle, crossing over the pressed point. Stitch along the diagonally cut edge of the star point fabric. Trim background fabric and press open.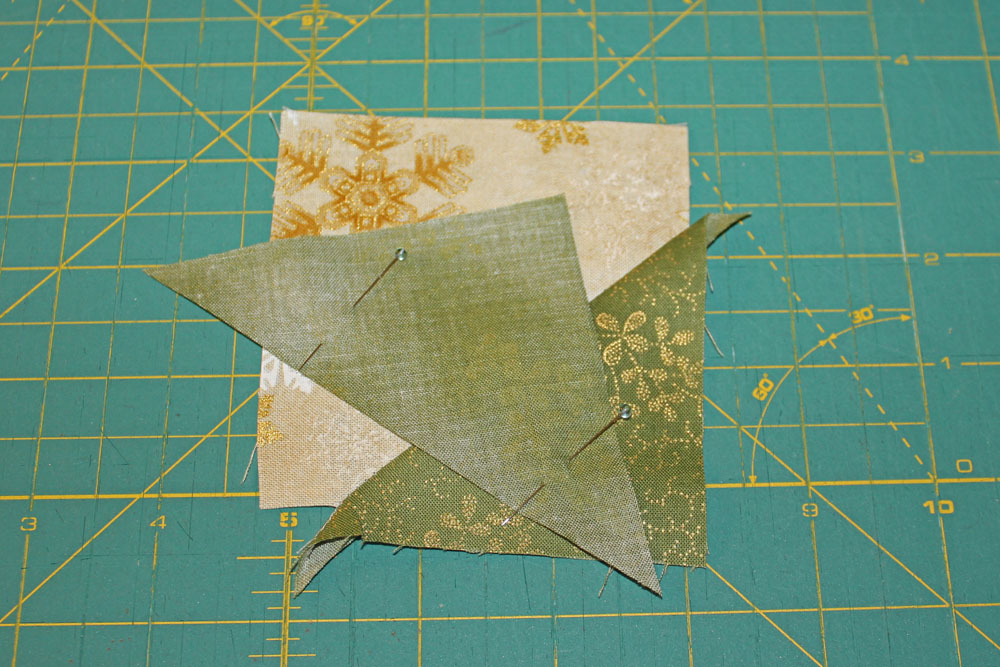
Your block should look something like this:
Now you need to trim your block to 3 1/2″ square. I used the Creative Grids Quick Trim Ruler, which has many wonderful uses and is perfect for squaring up these blocks.
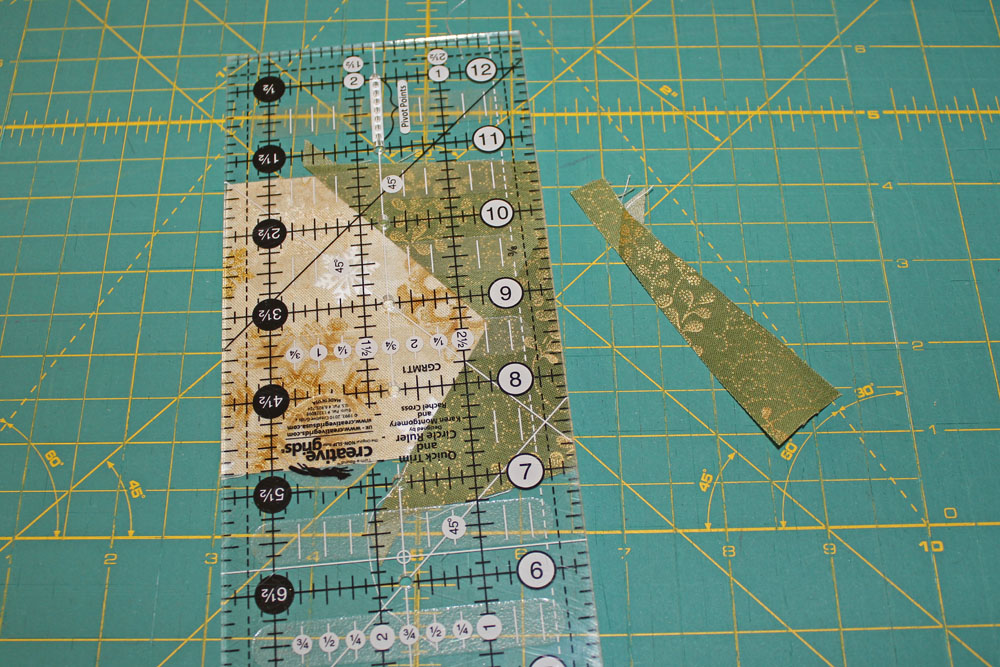
When your block is squared-up, it should look similar to this:

Repeat with three star point blocks. Lay out your block as seen below, placing your star points in the most aesthetically pleasing design.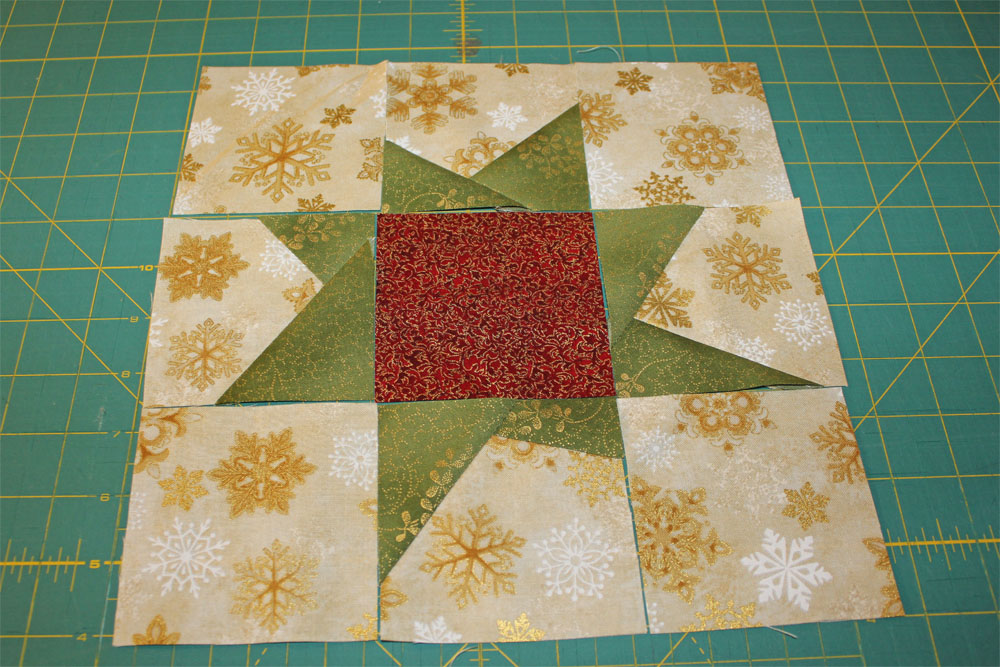
Pin the first two blocks of each row, right sides together.
Press open, in opposite directions for each row. Press the first and third rows towards the left, and press the second row to the right. This allows your seams to nest together, as shown below. This will allow you to have more accurate points when you sew your rows together.

Pin the last block of each row to the previously sewn rows. Press seams in the same direction as the previously stitched rows. See how the seams nest?
Sew your rows together to complete your first wonky star block. Square your block to 9 1/2 inches.
Repeat with remaining nine wonky star blocks. You should have five dark green stars and five light green stars.
A few tips that I learned the hard way:
- Make sure to leave 1/4″ at the top and bottom of the seams of the star blocks, with the green points, to make sure you actually have points on your stars. They don’t need to match, but you’ll want to make sure to have points!
- If you chain piece, works in chunk of four point squares so you vary the star points for each star block.
- You’ll have extra 3 1/2″ squares from each color, in case you make a mistake (which I’m sure you won’t, but it’s always nice to know you’ve got a little wiggle room).
Once all of your wonky star blocks are made, it’s time to assemble the quilt. Use this diagram as your guide. Lay out your quilt on a bed or design wall before beginning assembly. We put star blocks in the corners, but you could put your square blocks in the corners as well. Design to your tastes.
![]()
- Attach your side inner borders (2 1/4″ x 43″) to the panel. Press seams toward the inner border.
- Attach your top inner border (3″ x 27 1/2″).
- Sew together your border block strips. Sew in groups of five: five blocks along each side and five blocks along the top and bottom.
- Attach your block borders, sewing your side borders on first, then your top and bottom. Press seams towards the inner border.
Quilt as desired, then bind.
Our Winter’s Grandeur Quilt was quilted on the long-arm at the shop, using cream-colored Glide thread by Fil-Tec and swirly pattern. Here’s a detailed image of the quilting, blocks, and panel.
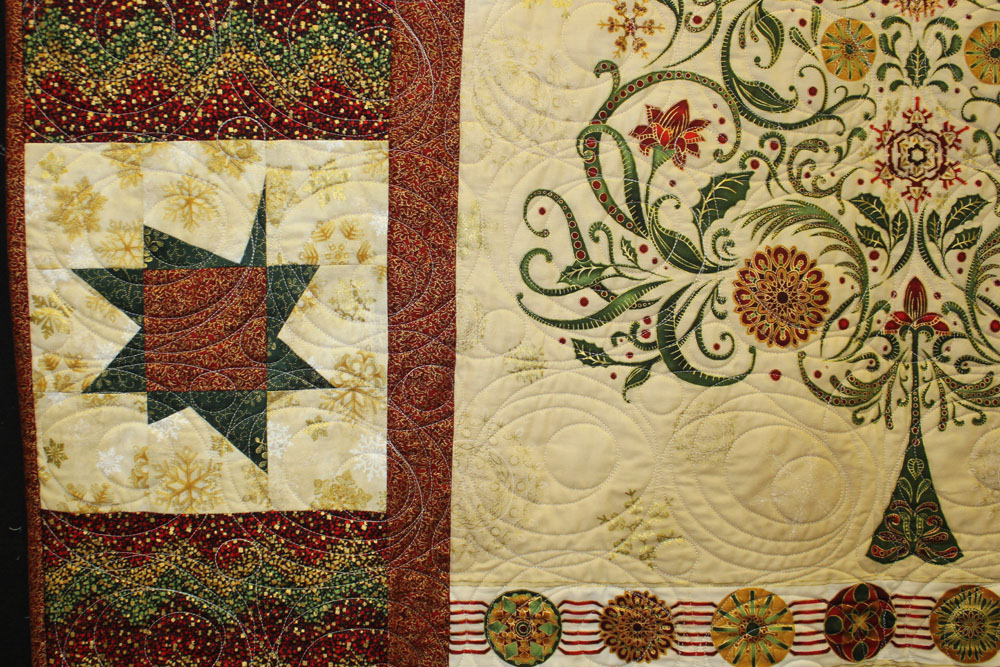 Isn’t it gorgeous? This panel deserves a certain amount of pizazz, which this design gives in spades. And don’t you just love the gold holiday chevrons? A little modern twist on the traditional shimmer holiday fabric.
We have kits available to make this quilt. Get one while you can! I have a feeling that these won’t last! You can also purchase the panel and coordinating yardage to make your own version.
 To view previous Deck the Halls projects, visit:
Monday: Winter’s Lane Table Topper
Tuesday: 20-Minute Table Runner
Wednesday: Hexagon Tree Skirt
Thursday: Christmas Ornaments
Friday: Scrappy Stocking
